LIGHTING PRACTICE · 7 MIN READ
One-light portraits: how to control a hard shadow on a wall
A graphic portrait does not need a complicated lighting rig. One compact continuous light, a reflector and a light-coloured wall can produce a striking image. The creative decision is where to place the shadow—and how to make it work with the person in your frame.
Explore the lighting setup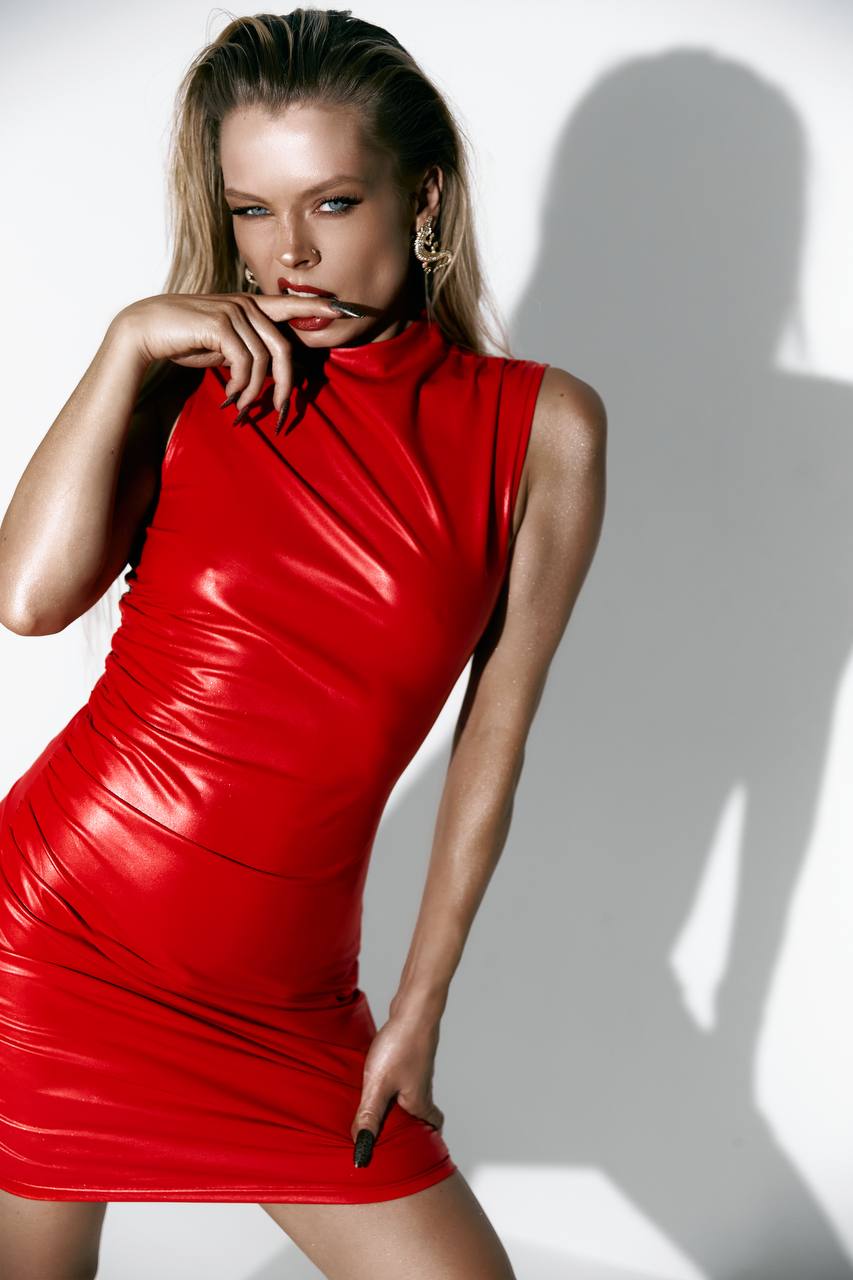
What you need for a hard-shadow portrait
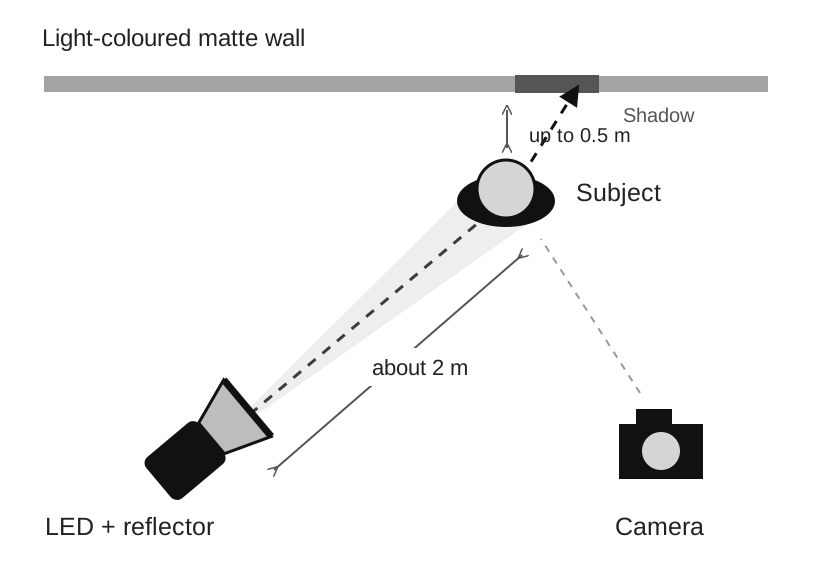
Start with a continuous LED light and a relatively small reflector, without a large softbox. The source needs to appear small from the subject’s position to produce a narrow shadow transition. The original KARIROOM setup uses a Godox SL200 II. Another suitable light can work too: output, apparent source size and placement matter more than the model name alone.
You also need a stable light stand, a light-coloured matte wall and room to move the light. Start with the lamp about 2 m from the subject, and the subject 20–50 cm from the wall. Treat these as reference positions, not measurements that every studio must reproduce exactly.
Set up the light in six steps
- Reduce other light sources. Where possible, turn off room lights and reduce window light. Take a frame with the main LED off. If the face is already well lit, ambient light will noticeably affect the final contrast.
- Place the subject near the wall. Begin with a gap of 20–50 cm, leaving enough space for a comfortable pose. Keep hands and clothes from touching the background.
- Position the LED in front and to one side. Start about 2 m away. Aim the reflector at the face and torso. Choose its height from the light pattern on the face rather than raising the stand as far as it will go.
- Choose where the shadow should sit. Move the light left or right and watch the silhouette on the wall. Then adjust height separately: the projected shadow moves in the opposite direction to the source.
- Inspect a test frame. Check skin highlights, clothing detail and the shadow’s position around the head. Good light on the face does not automatically create a clean background composition.
- Refine the pose. Turn the shoulders, change the hands and leave a little space between an arm and the torso. A small movement can clarify the silhouette without changing the equipment.
Camera settings are a reference, not a universal recipe
The original setup lists a Canon EOS R, an EF 24–70 mm f/2.8L II USM lens and these settings:
Your light output, working distance, room reflections and subject movement will change the exposure you need. A still pose may allow a slower shutter speed; moving hands may need a faster one. Inspect sharpness at a useful magnification rather than assuming one speed freezes every movement.
Choose shutter speed for movement and aperture for the depth of field you want. Then adjust the lamp output and ISO. If important skin highlights lose detail, reduce exposure. If the frame is too dark, check the light’s direction and output before pushing ISO much higher.
f/2.8 does not guarantee a blurred wall. Background rendering also depends on focal length, camera-to-subject distance and the gap behind the subject. In this setup, a visible shadow is deliberately part of the image.
With continuous light, shutter speed changes recorded exposure in the usual way. If you replace the LED with flash, work within the camera’s flash-sync limits: do not automatically carry a 1/500 s shutter speed across to a flash setup.
How to fix the shadow and contrast
The shadow is too large
Move the subject closer to the wall or move the light farther away while maintaining its direction. Recheck exposure afterwards.
The shadow merges with the face or body
Move the source sideways and refine the pose. Look for clear spaces between overlapping outlines.
The outline is too soft
Reduce the subject-to-wall gap, remove a large diffuser and check other lights and reflected fill.
The edge is too hard for the image
Increase apparent source size with diffusion. Moving the subject farther from the wall can also widen the penumbra, but changes the silhouette’s size at the same time.
There are several shadows
Check windows, ceiling lights and additional lamps. Keep one dominant source.
Skin or glossy fabric loses highlight detail
Reduce exposure and slightly adjust the light angle or pose. Shiny surfaces reflect the source strongly.
“Higher light equals a shorter shadow” is not a reliable rule for every pose and camera position. Height primarily changes the direction of projection; the shadow’s length and shape depend on the whole scene’s geometry.
A short exercise: one light, three variations
Fix the camera position and starting lamp output. Make three comparisons, changing just one variable each time:
- Distance from the wall. Compare a 20 cm gap with a 50 cm gap. Look at the silhouette’s size and edge transition.
- Light position. Return the subject to the original mark and shift the source sideways. Notice changes in both the nose shadow and the wall shadow.
- Pose. Leave all equipment in place and change the shoulders and hands.
Save the frames with notes about distances, source placement, output and exposure. This small lighting log makes a useful result much easier to repeat at the next shoot.
Quick questions
Do I need a Godox SL200 II?
No. Another suitable light can work if it provides enough output and the hard-light pattern you want. Changing the source or reflector means adjusting exposure and placement again.
Does the wall have to be white?
No. A smooth, light-coloured matte surface is a useful starting point. Colour and texture affect the result, and a glossy wall can introduce unwanted reflections.
Why is the shadow still soft without a softbox?
Check apparent source size, the distances involved, window light and reflected fill. Removing a softbox does not guarantee the same edge sharpness in every room.
Can I use this setup for video?
Continuous light lets you see the pattern during recording. Choose shutter speed for your frame rate and check for flicker separately; the still-photo settings in this article are not a video preset.
Background and further reading
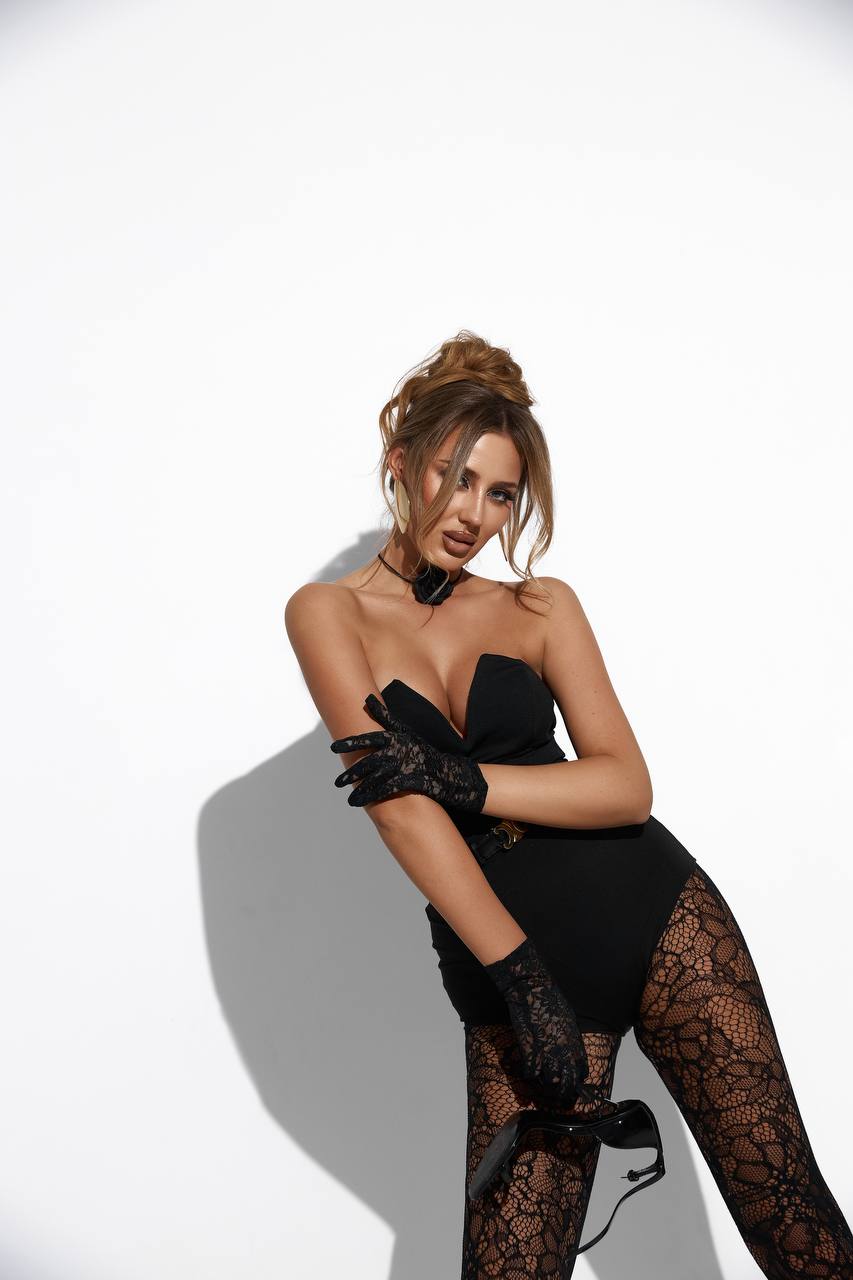
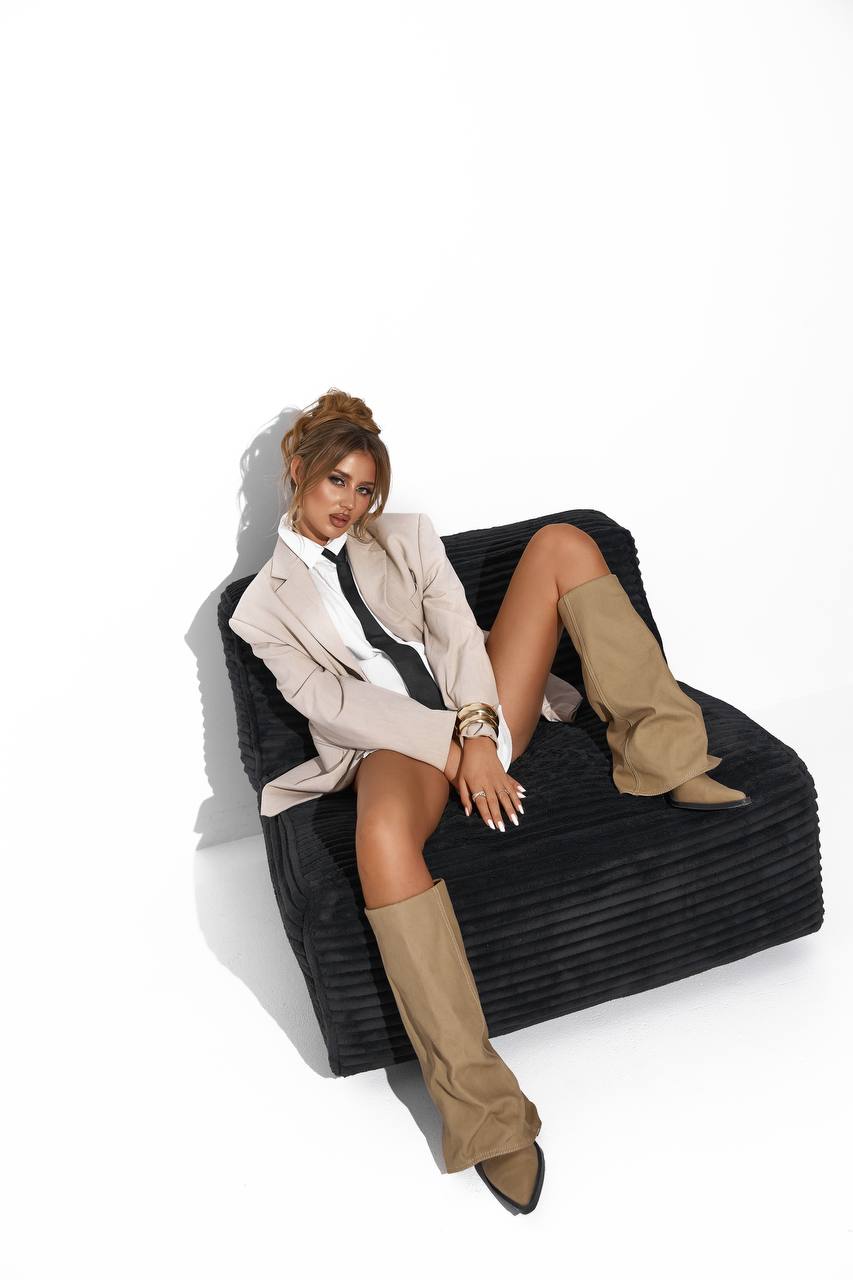
This is a standalone teaching adaptation of the idea in KARIROOM’s article. The photographs come from its published series; the diagram was drawn anew for KARINAPHOTO. Check KARIROOM’s website for current studio-hire terms.
- Original KARIROOM walkthrough and free PDF
- Canon: understanding depth of field
- Godox: SL-series continuous lighting
KARINAPHOTO practical notes · 17 October 2026
More photography articles